Heads up: this sales page is in English, but the portal itself is in Dutch.
From nothing to running
8 steps, walked through once. It takes about half an hour, and after that the portal does the work. Everything is also in the help on its own, for when you want to look something up later.
- 1Your own address and your direct debit
- 2Pasting your bol key
- 3Entering your company details
- 4Putting the portal on your phone
- 5Switching on notifications
- 6Seeing the first orders come in
- 7Switching on review emails
- 8Keeping an eye on your stock
Your own address and your direct debit
Signing up is three fields and a payment. After that you have your own address on your login on ordly.nl, a password you chose yourself, and a portal waiting for you.
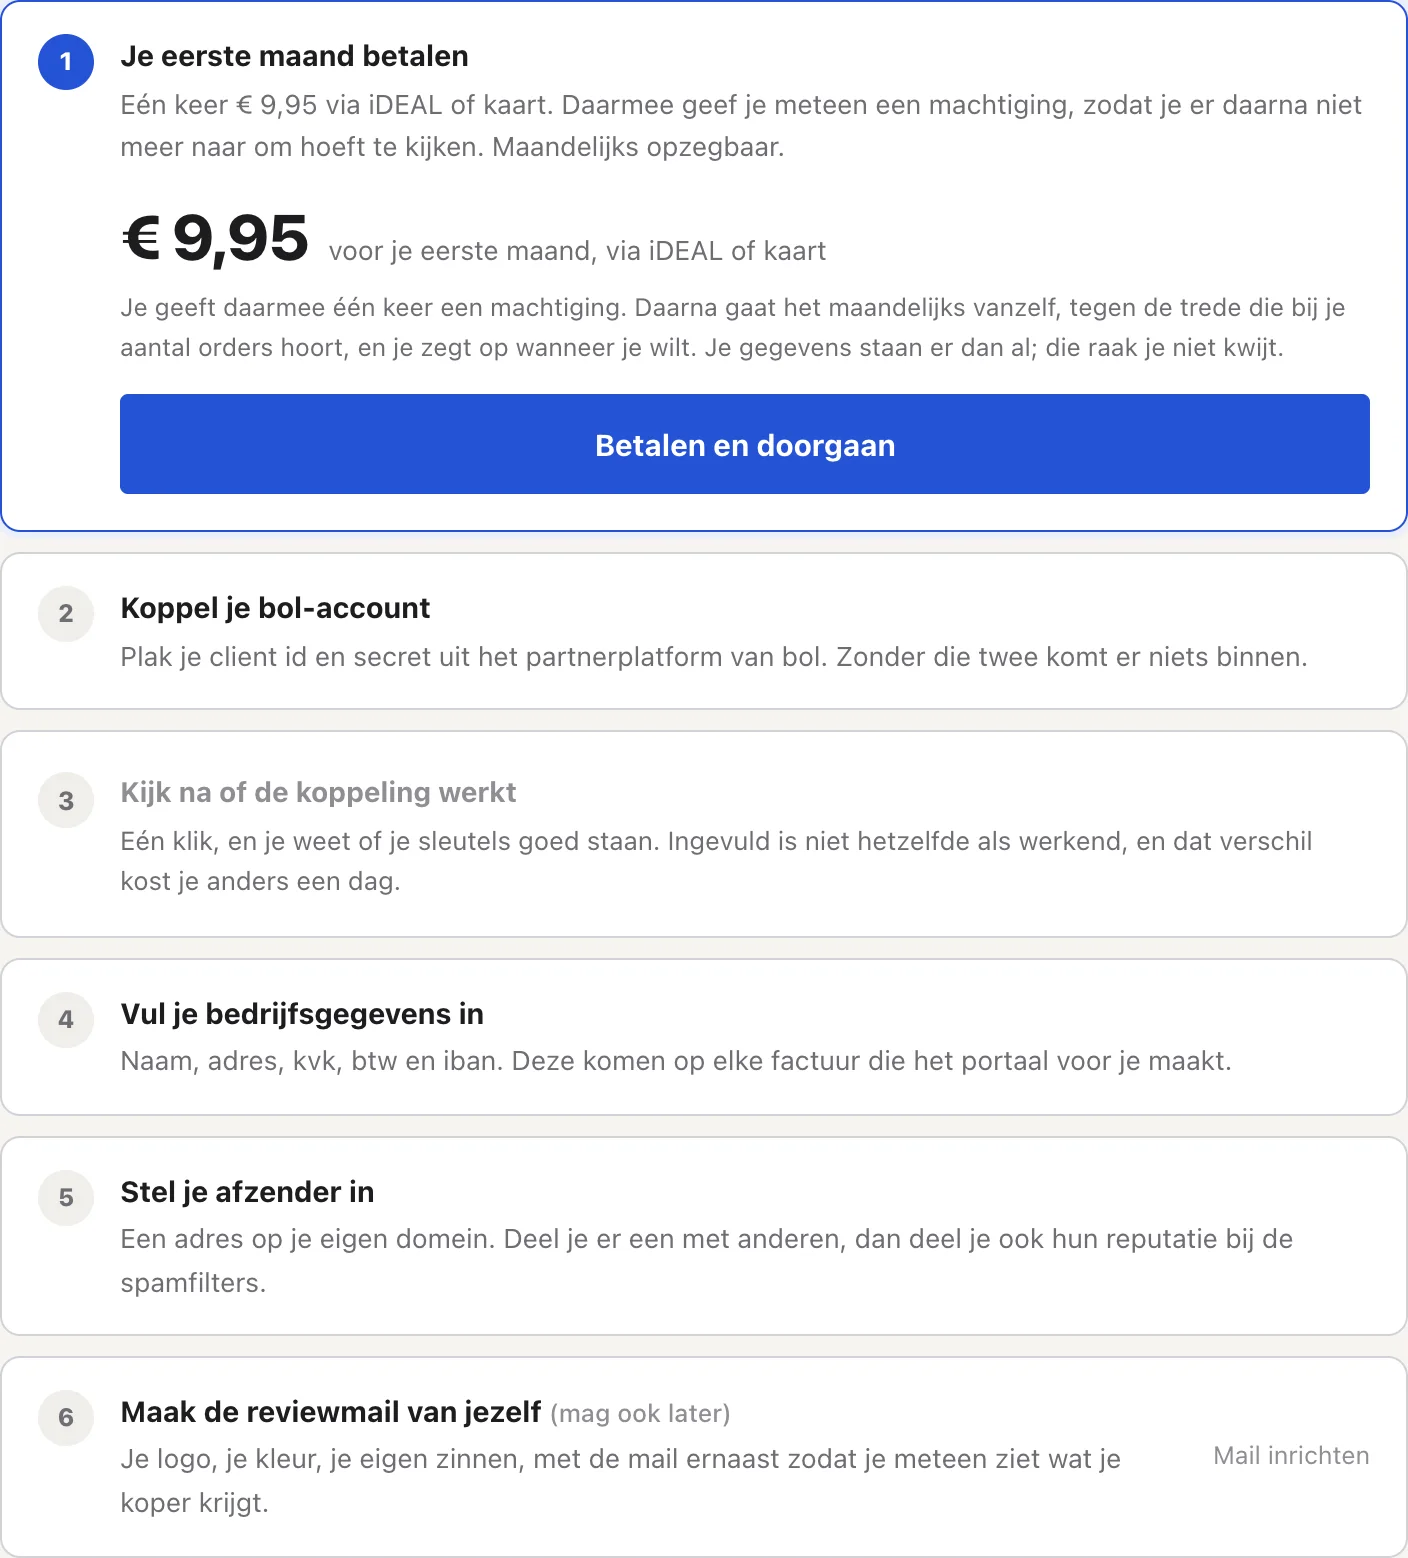
- On ordly.nl, enter your company name, your email address and the address you want. You see straight away whether it is still free.
- You land on your own address and choose a password there. A sentence works better than a word.
- Read the agreement about buyers’ data and tick the box; it comes up once.
- Set up your direct debit with € 0.01, by iDEAL or card. That way you never have to think about it again.
Pasting your bol key
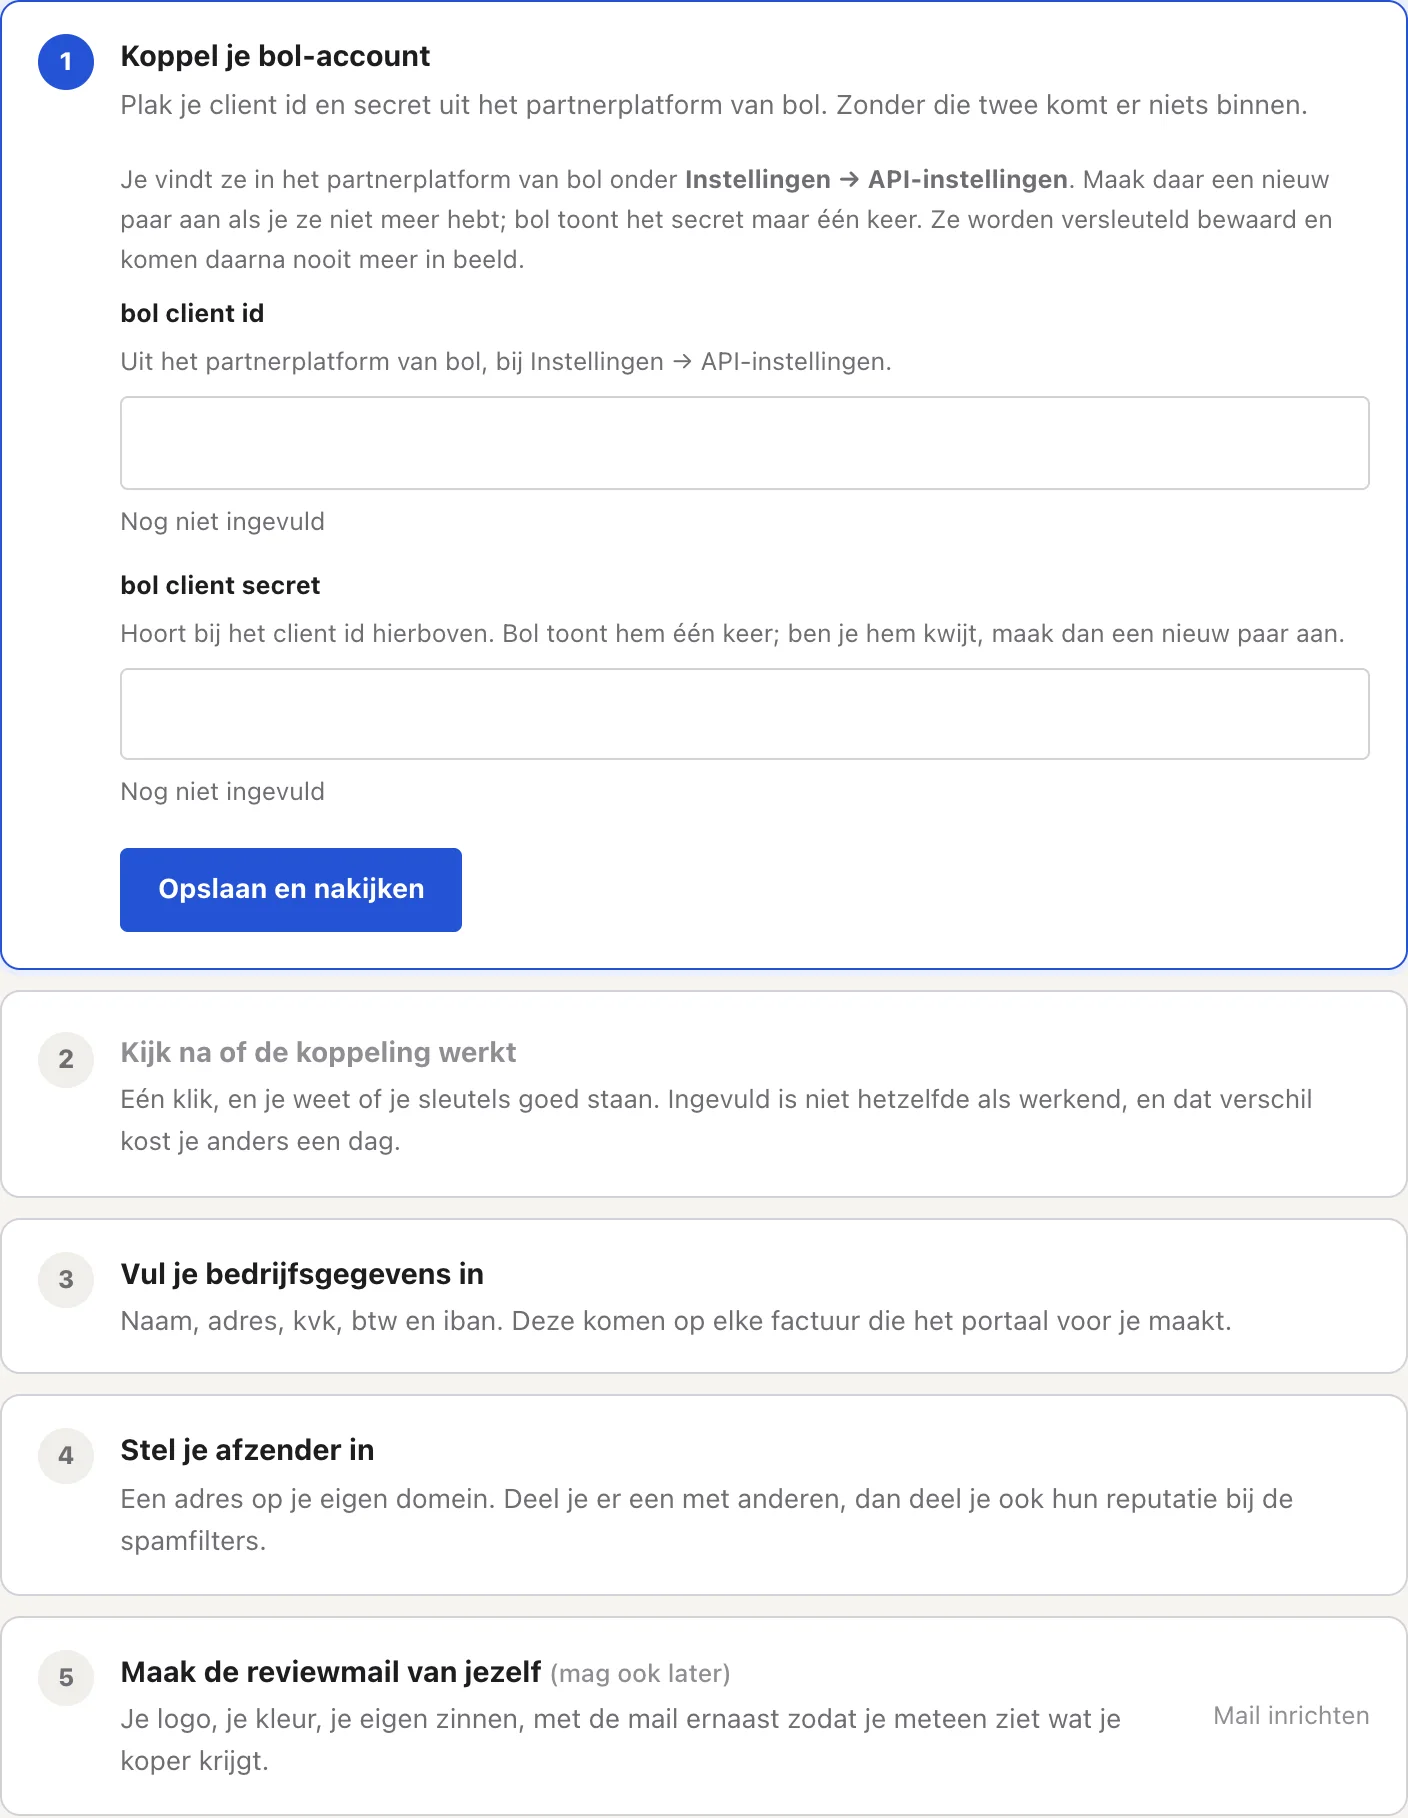
Without these two lines Ordly cannot fetch anything from bol. It is the only step you really have to do yourself; the rest follows from it.
- Sign in at partner.bol.com with your own account. We never sign in for you.
- Go to Instellingen → API-instellingen (Settings → API settings). Choose the Retailer API and then Client credentials; that is the kind Ordly needs (not the Advertising API, not Shared offers).
- You get a client ID and a client secret. You only see the secret once, so copy it straight away.
- Paste both on Aan de slag and press Opslaan en nakijken (Save and check). The portal then asks bol straight away whether they work.
Entering your company details
These go on your invoices. An invoice without a VAT number or chamber of commerce number is not a valid invoice, and you only find out when a business buyer emails about it.
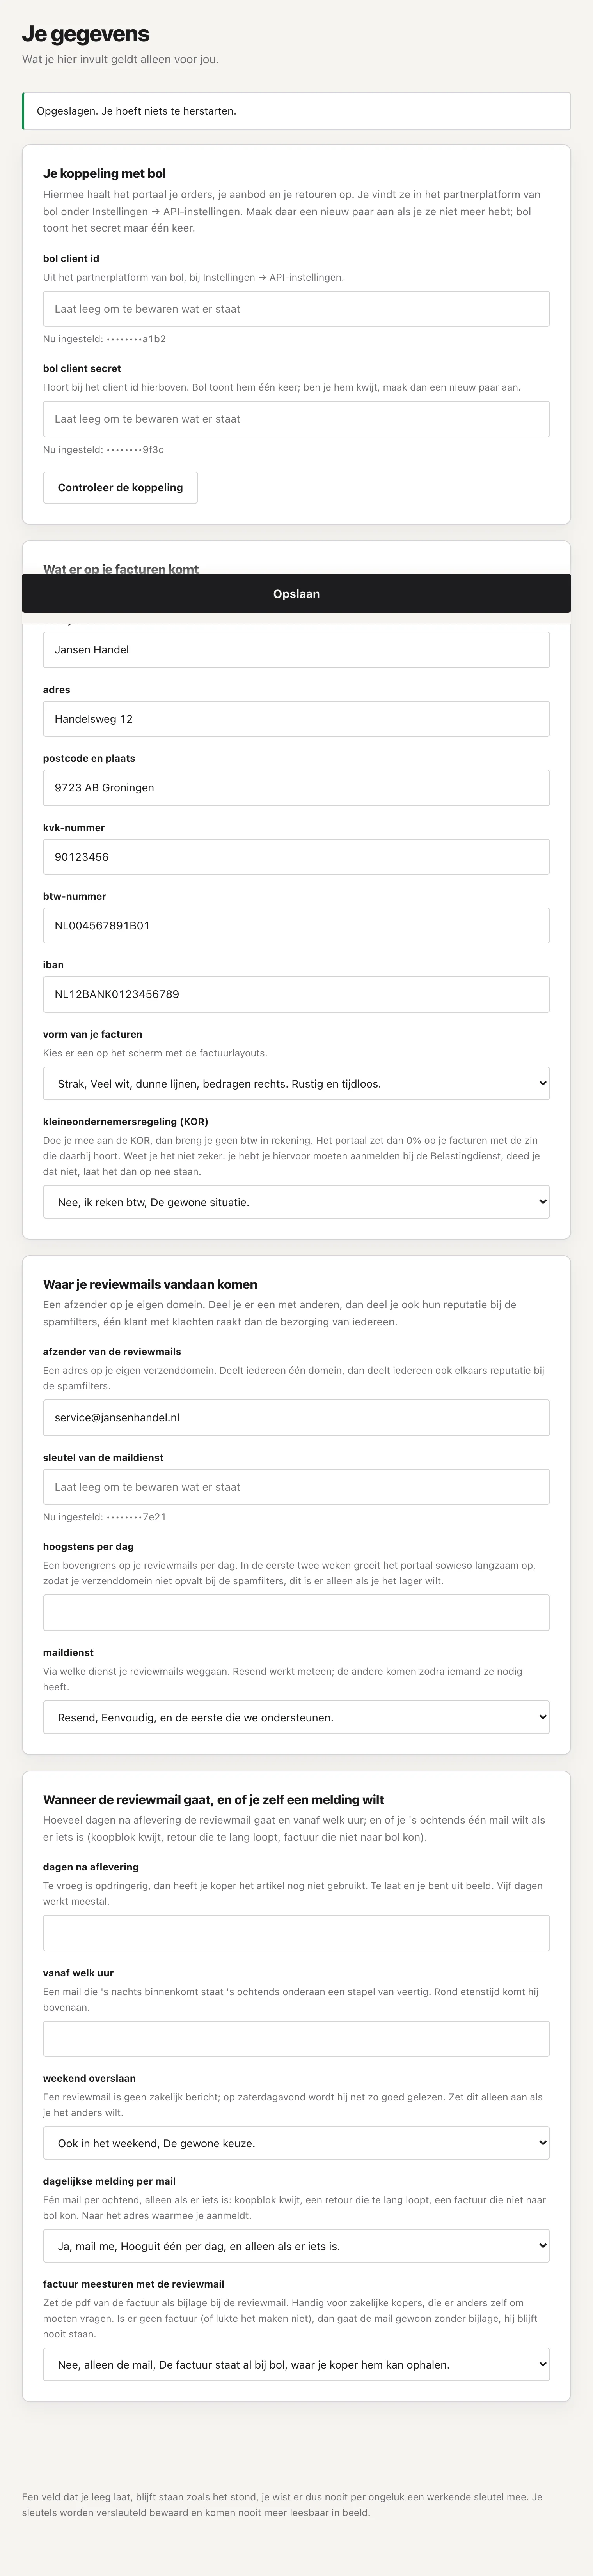
- On the same screen, enter your name, address, postcode, city, KvK and VAT number.
- Under the Dutch small business scheme? Tick that box; we then charge no VAT and put the right sentence on the invoice.
Putting the portal on your phone
Ordly is an ordinary website, but you can put it on your home screen as if it were an app. On an iPhone that is also required if you want notifications, an Apple rule.
- iPhone and iPad: open your portal in Safari (not Chrome, it does not work there), tap the share button at the bottom (the square with the arrow up), scroll to “Add to Home Screen” and tap Add.
- Android: open your portal in Chrome, tap the three dots top right and choose “Install app” or “Add to home screen”. Chrome often offers it by itself.
- After that, open the portal from that icon, not through the browser.
Switching on notifications
A nudge on your phone the moment something sells, or when your stock runs low. This is the part that means you do not have to keep looking all day.
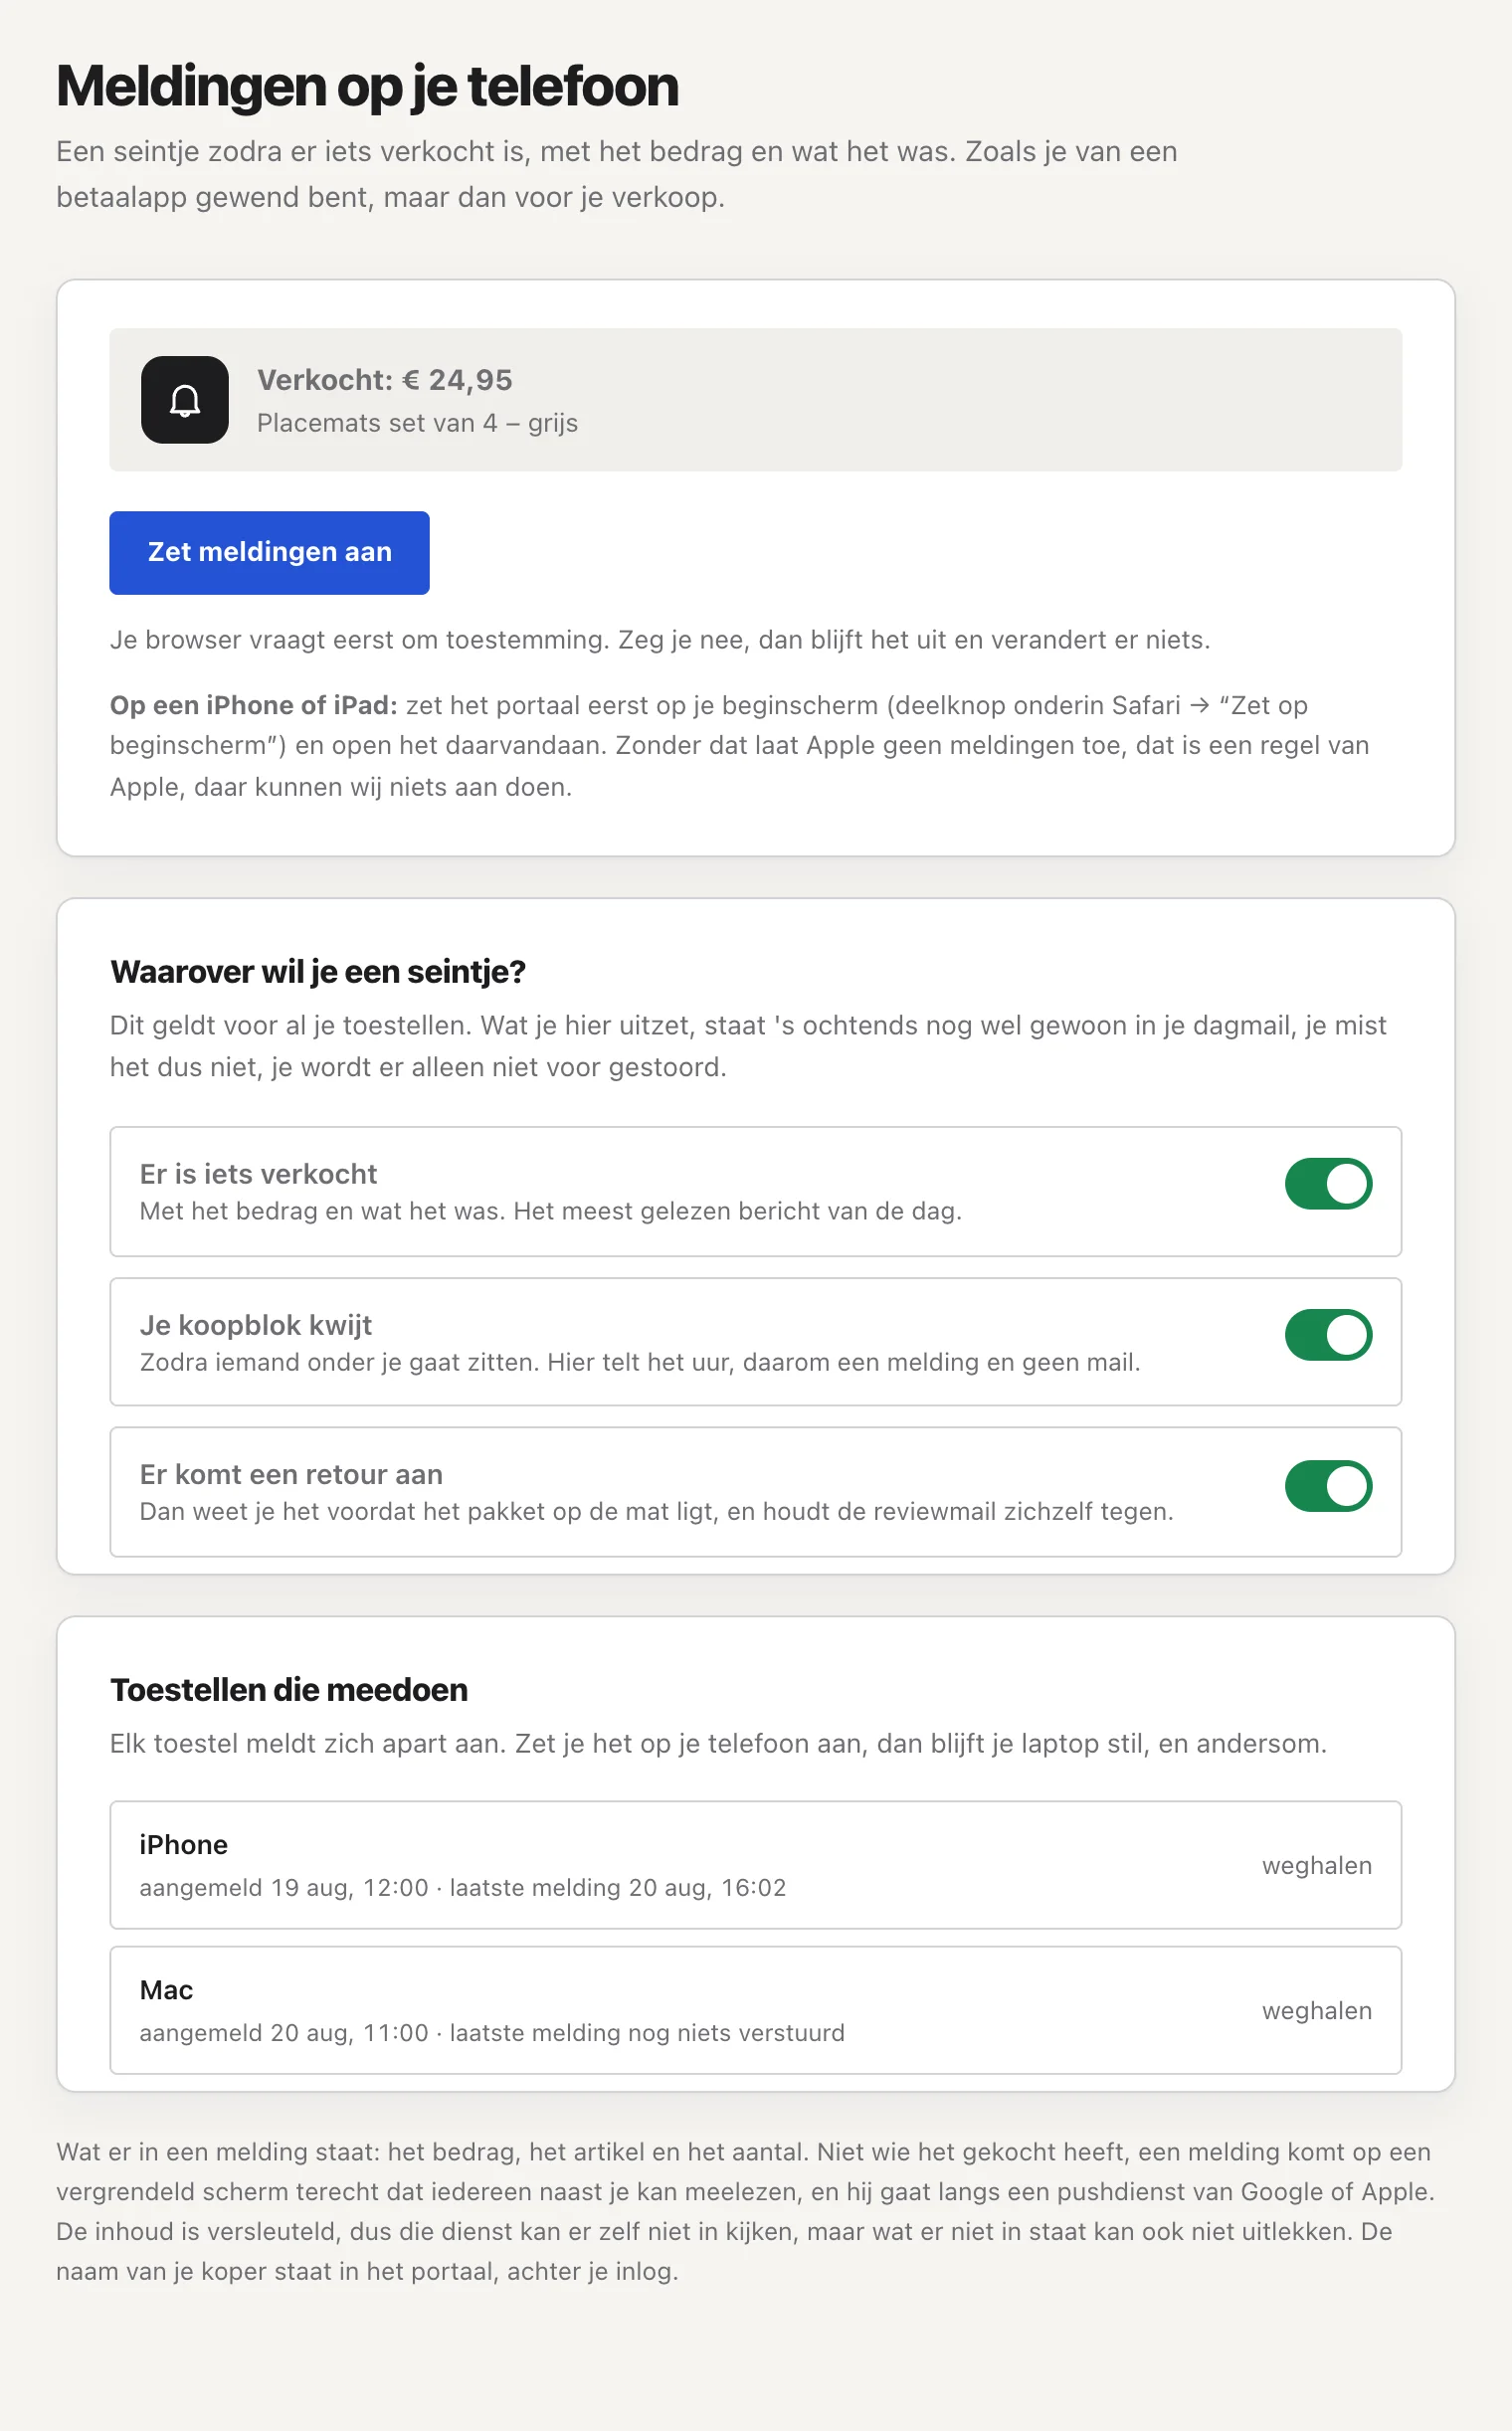
- Go to Meldingen (Notifications, the card on Instellingen) and press Zet meldingen aan (Turn on).
- Your browser asks for permission. Say yes; if you say no, the button does nothing until you reverse it in your browser settings.
- Press Stuur een proefmelding (Send a test) and switch your screen off for a moment.
- There are two kinds: something sold and your stock is running low. Switch off what you do not want to be disturbed for; it is still in your morning email.
Seeing the first orders come in
From now on the portal does the work. Every quarter of an hour it checks bol for new orders, and every hour it does a full round. You never have to press anything.
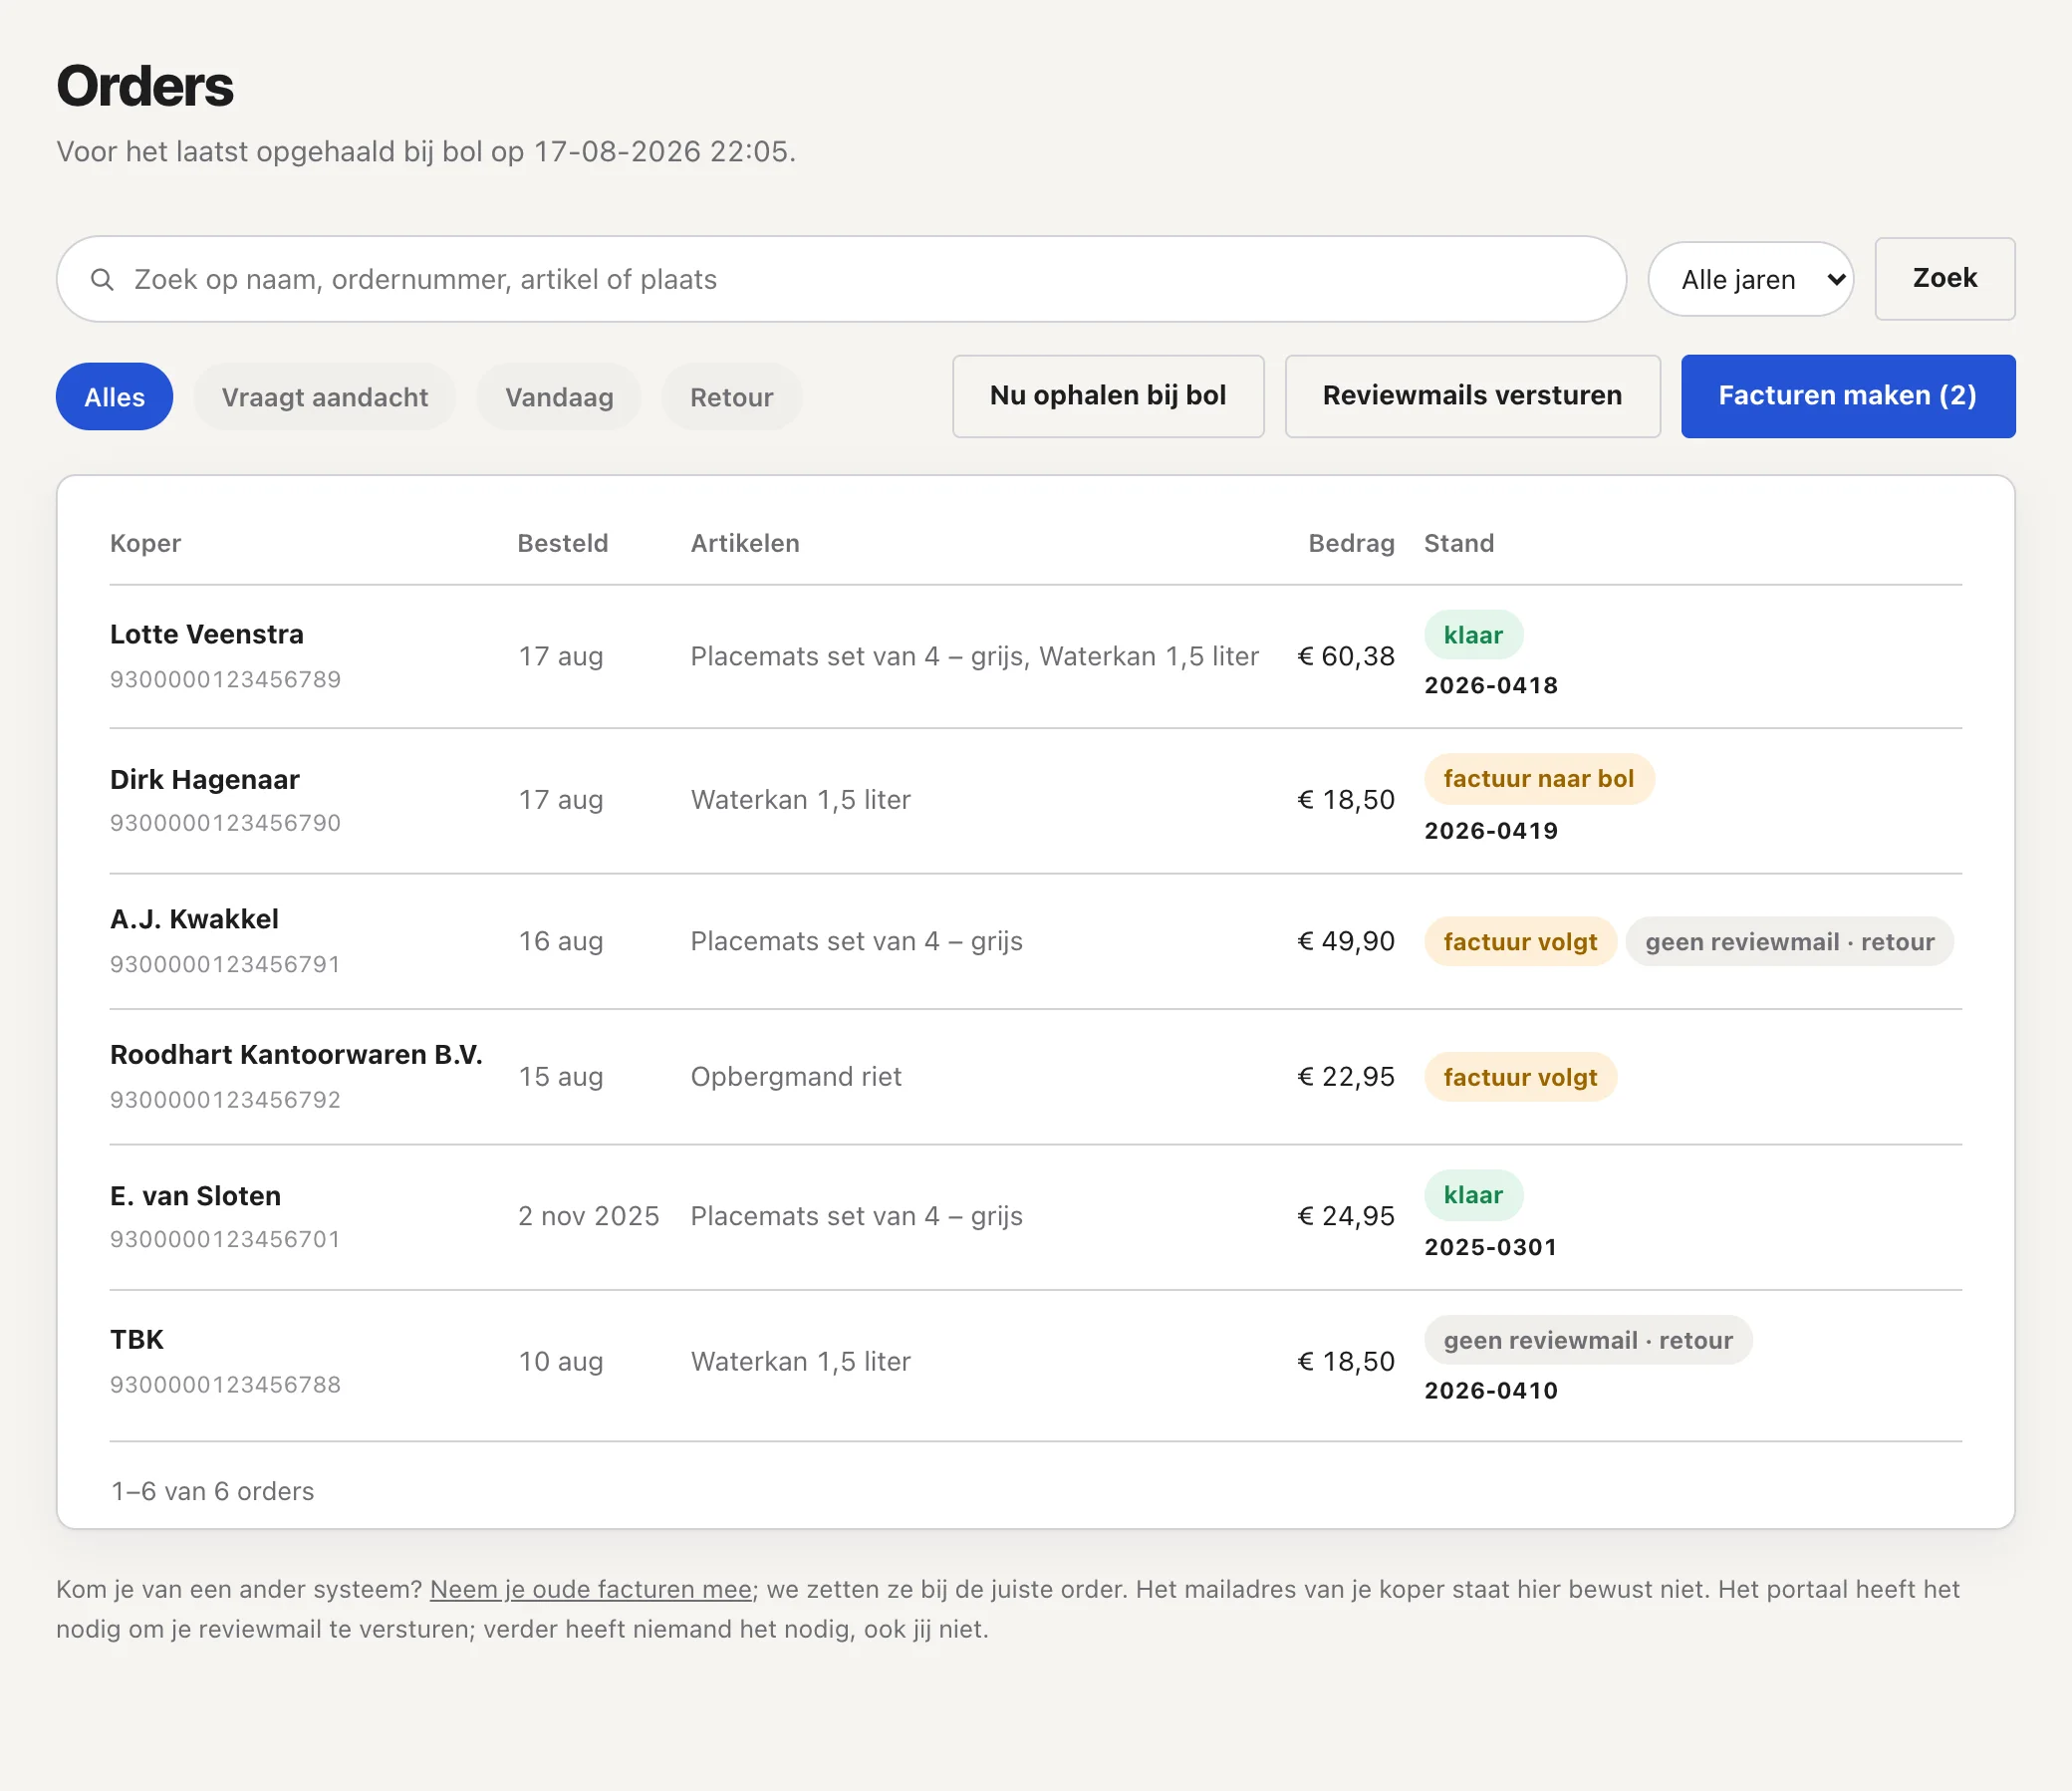
- Wait a quarter of an hour.
- On Orders every order has its status next to it: done, invoice to bol, or waiting.
- You can search by name, order number or item. “de.vries” also finds “LOTTE DE VRIES”.
Switching on review emails
One tidy email per order, five days after delivery, with your invoice attached. Bol’s rules are built in and cannot be switched off; that is deliberate, because that is what bol judges you on.
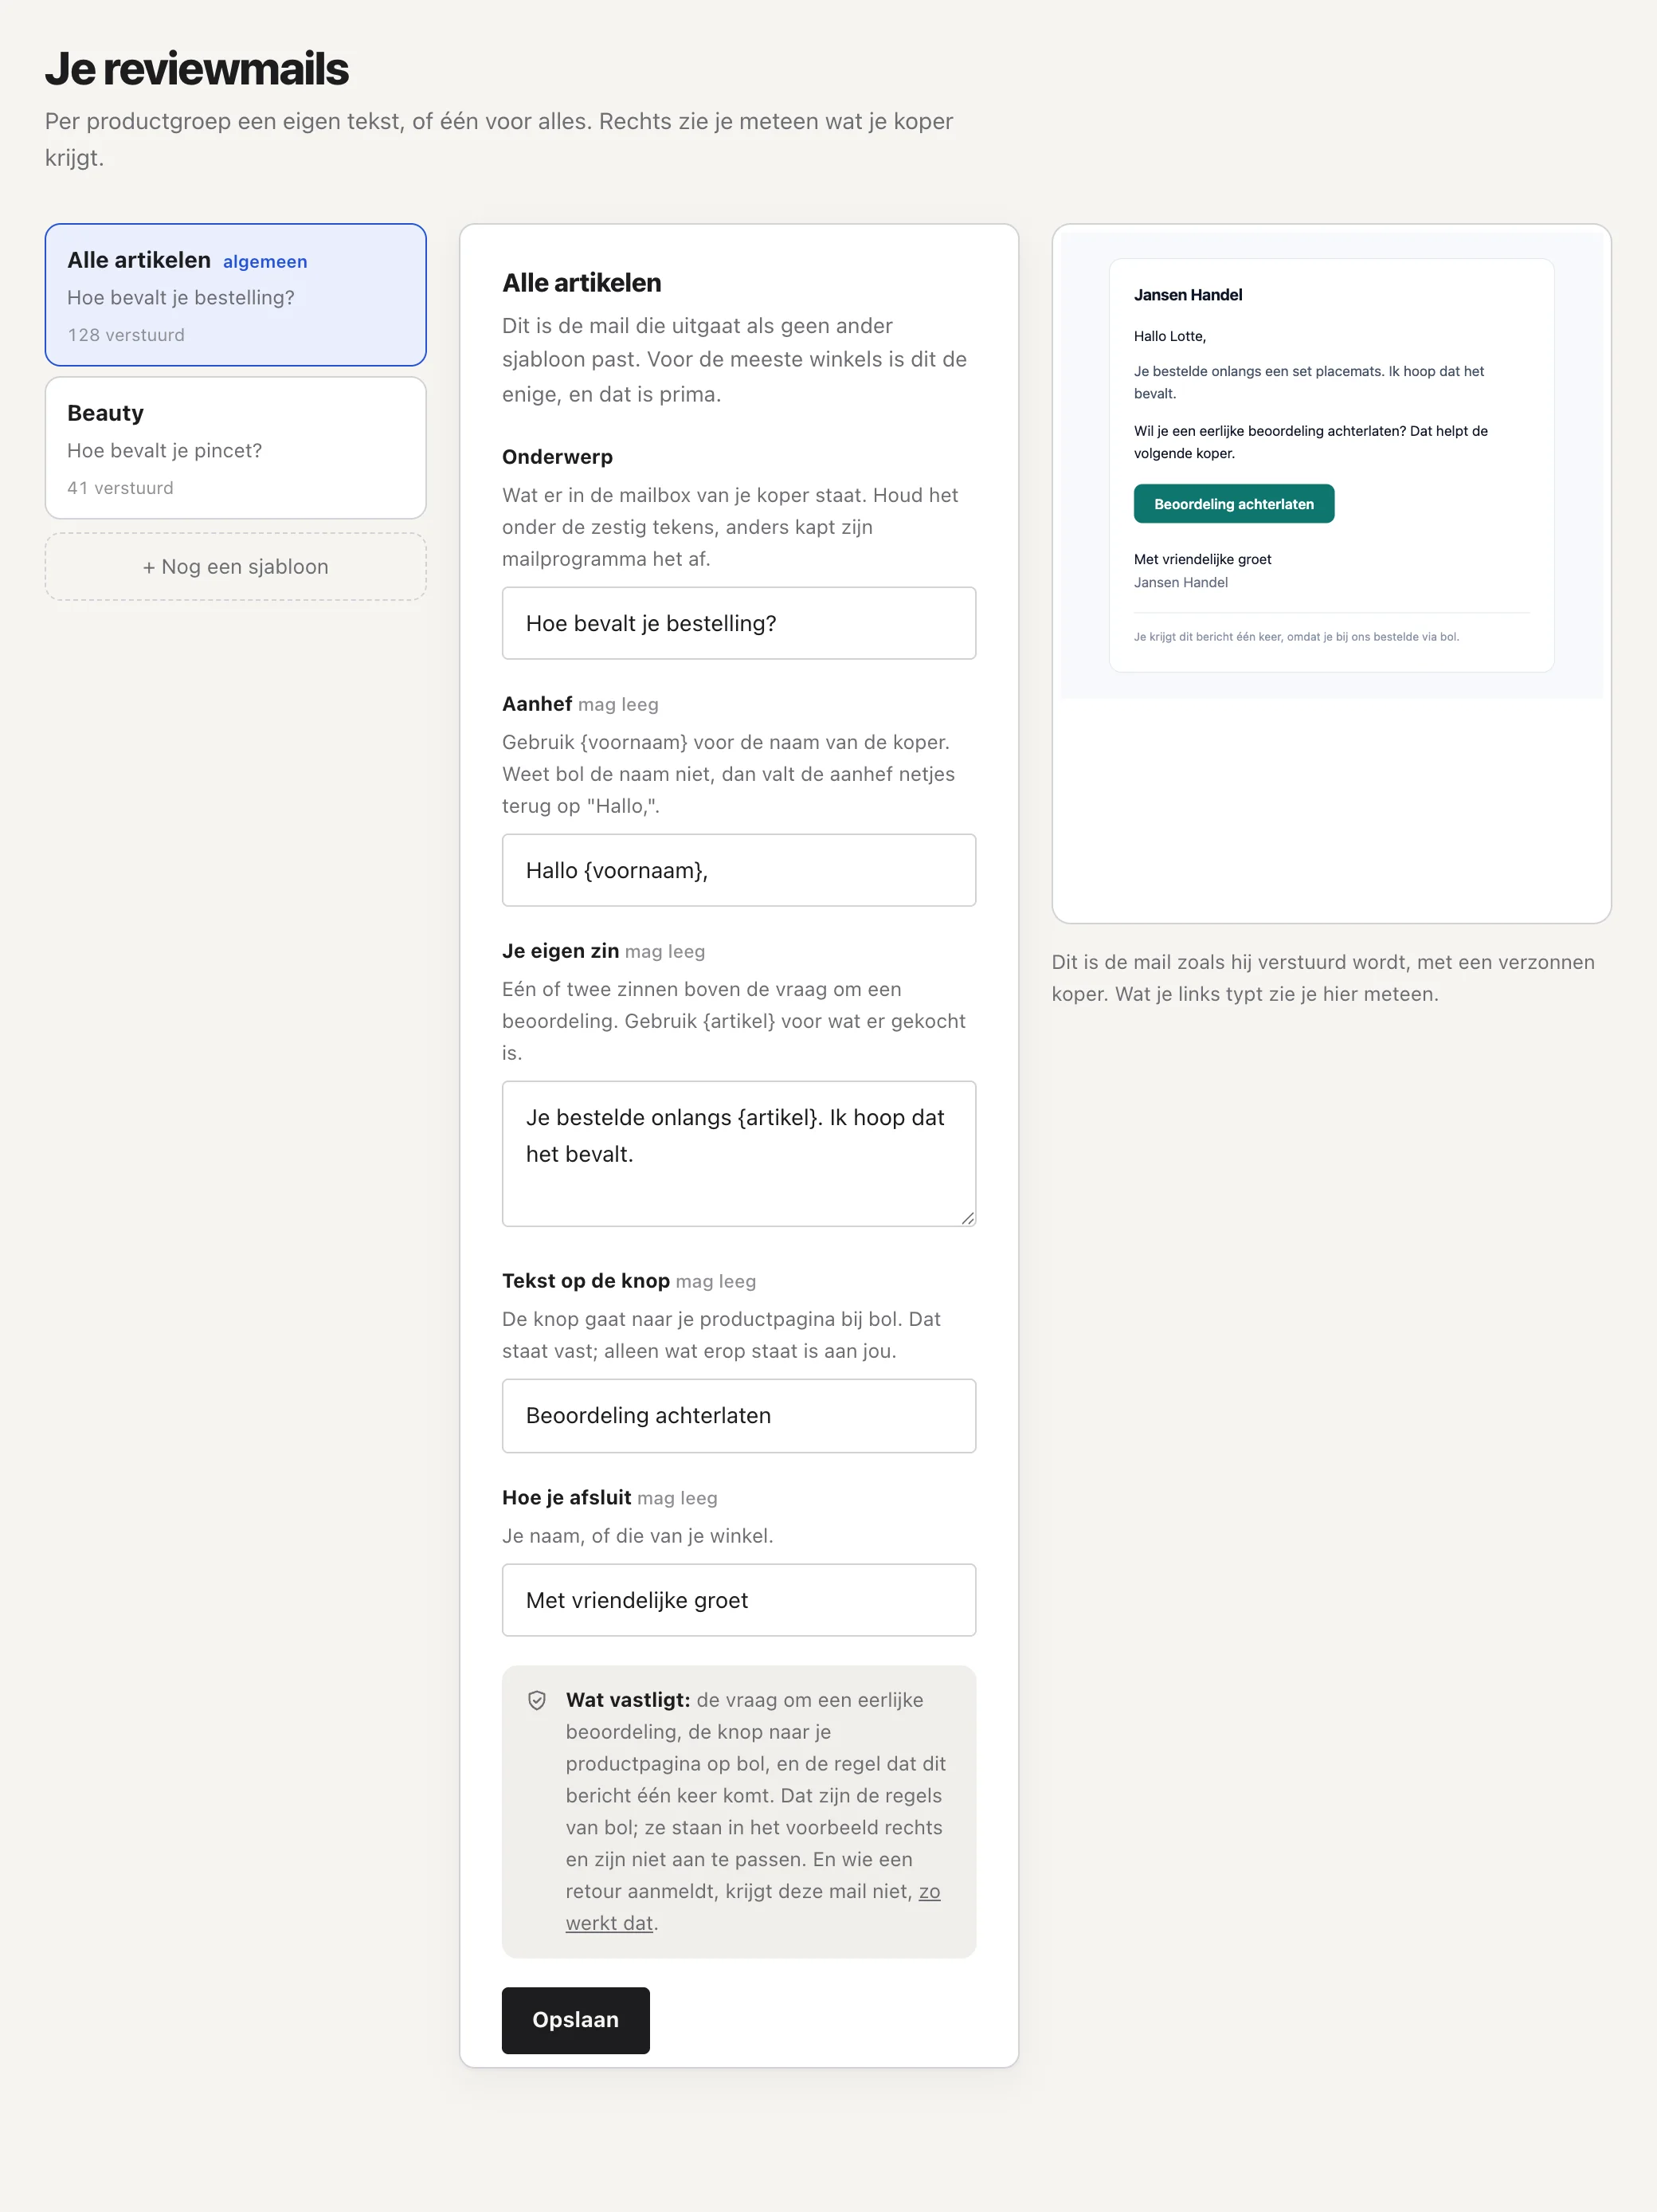
- Go to Reviewmails and read the standard template.
- Change the greeting and the sign-off to your own words.
- Add your logo (png or svg) and your colour. They also go on your invoices; your buyer never sees the name Ordly.
- Look at the preview: that is what your buyer gets.
- Switch it on. They go out in the evening at 19:00.
Keeping an eye on your stock
Every hour the portal checks how much you have and works out from your own sales how long that will last. So you see what to reorder before it runs out.
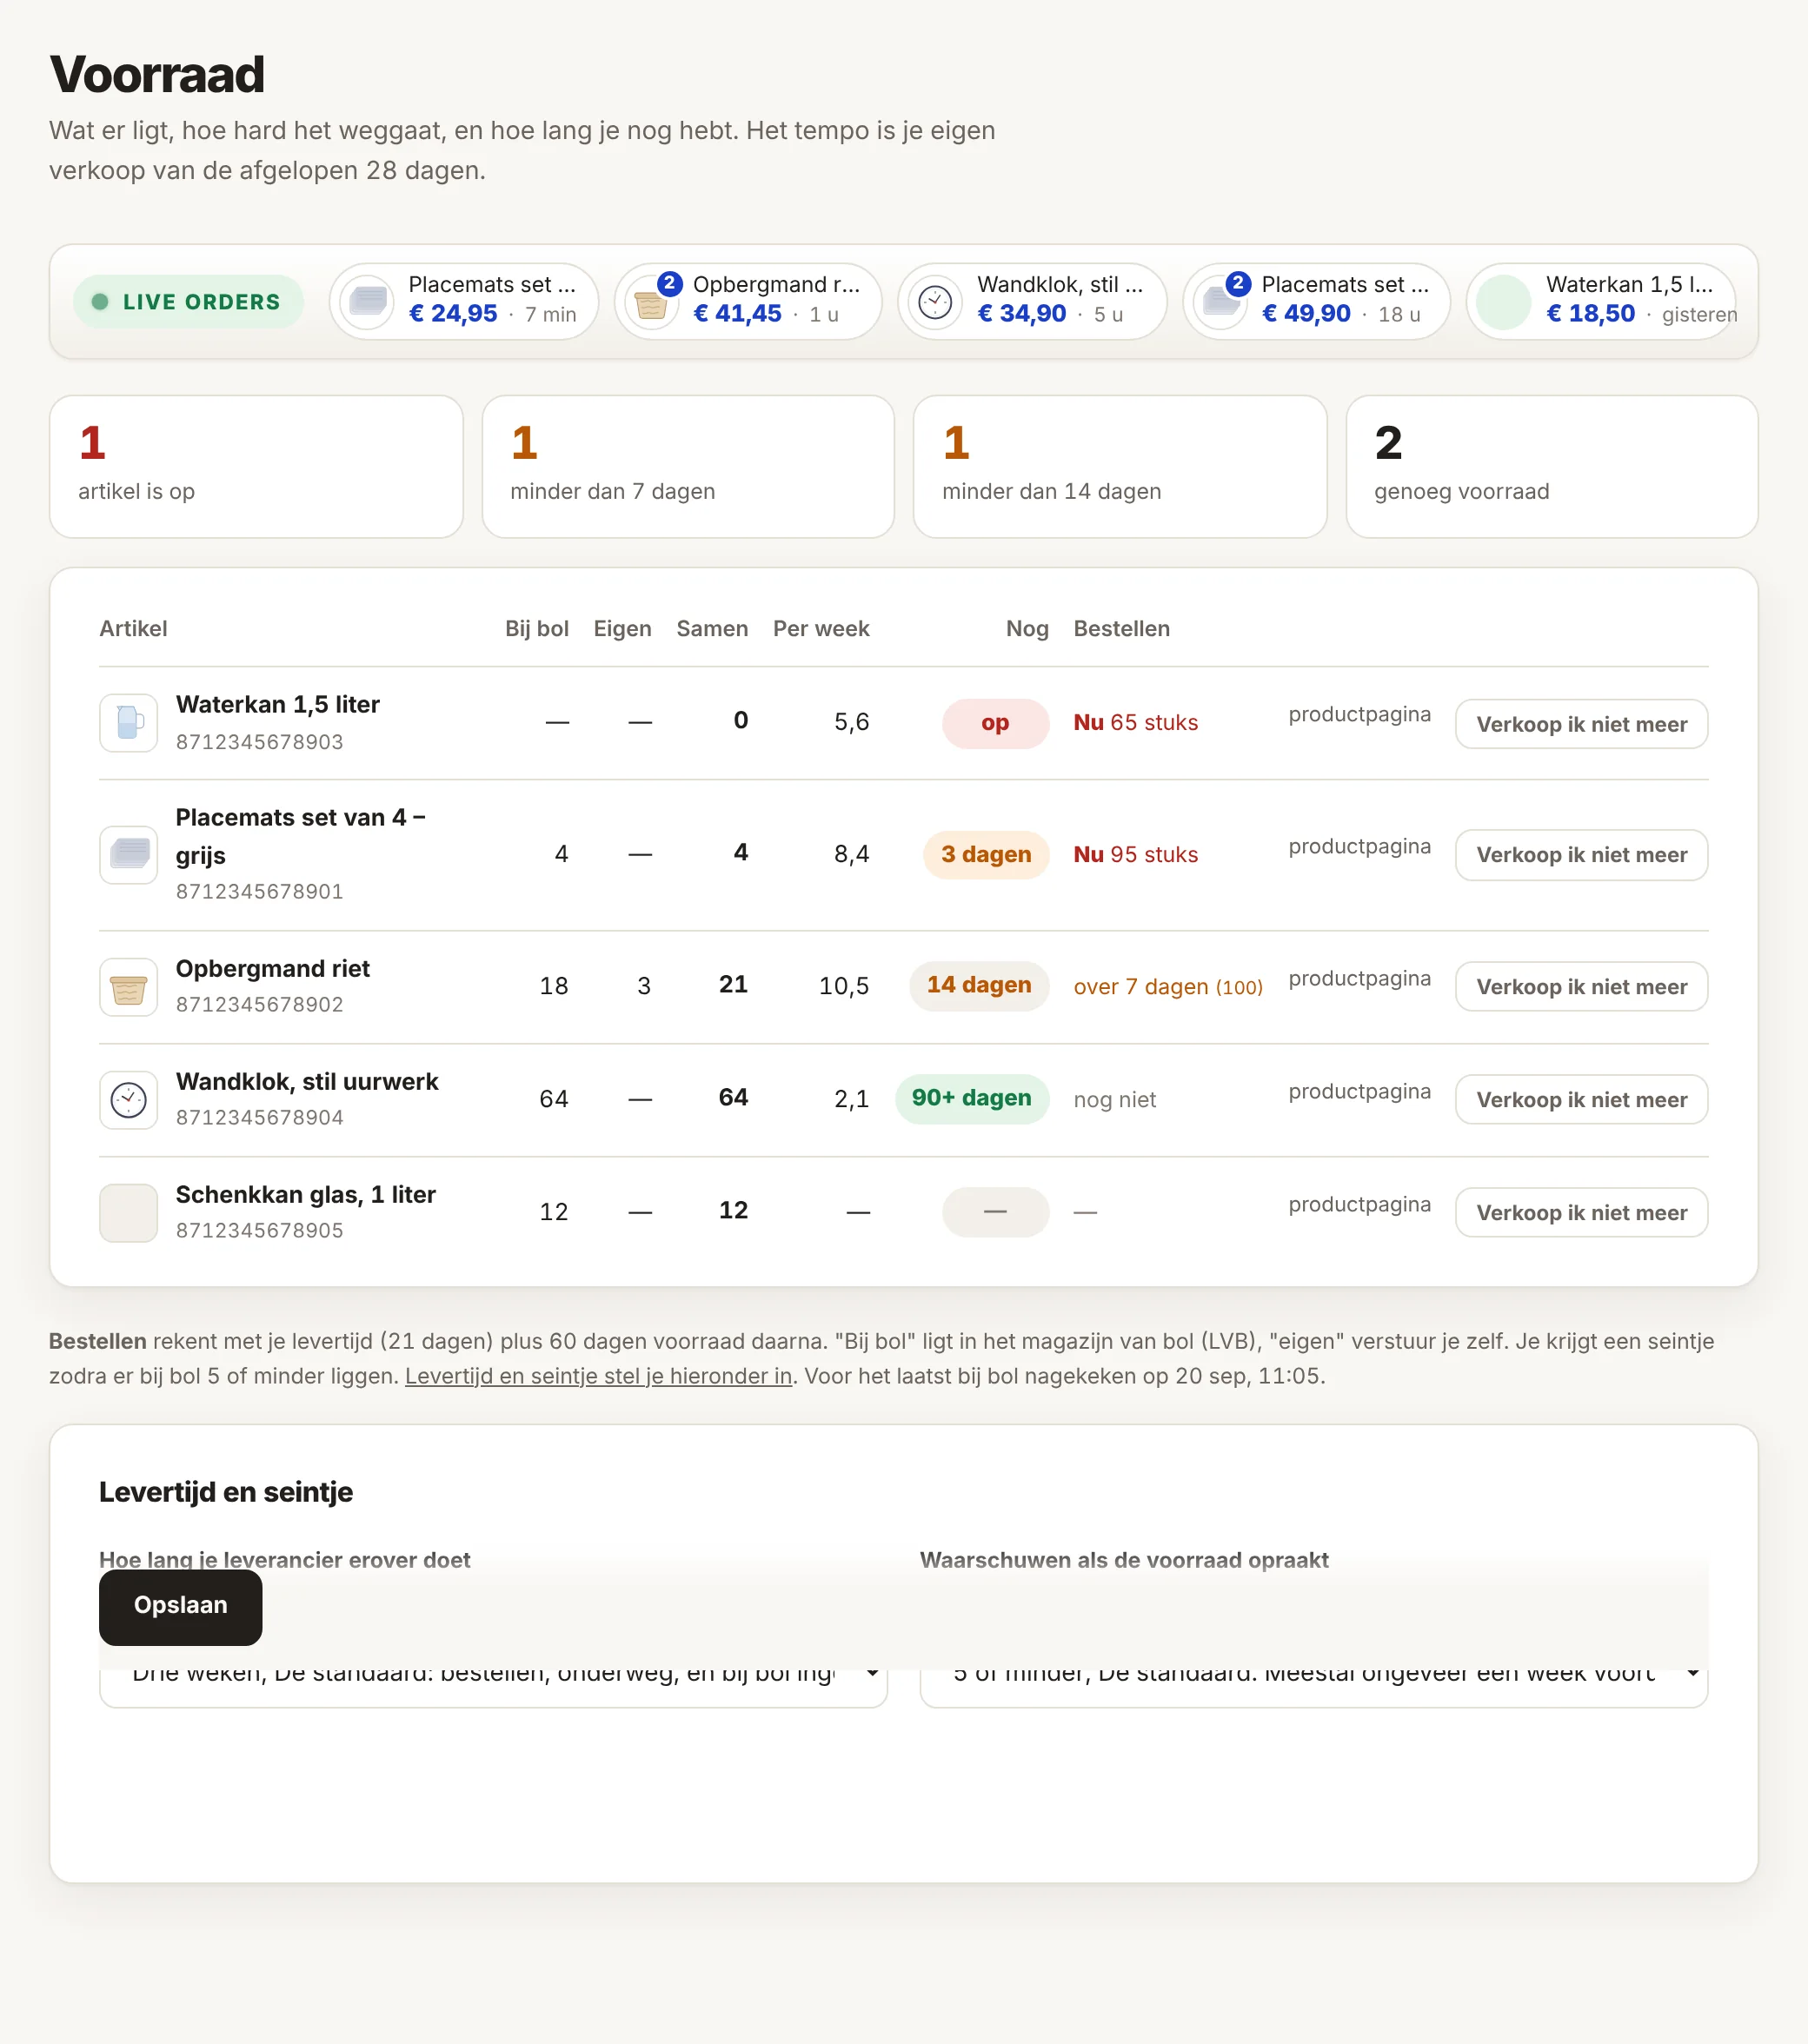
- Nothing to switch on; this comes along with the hourly round.
- On Voorraad (Stock) the tightest item is at the top, with how many days you have left and whether to order now.
- Set once how long your supplier takes and at how many pieces you want a nudge. Below the list it says where.
Stuck somewhere? Look in the help, where every topic is explained on its own. And if you really cannot work it out, email; there is a person there.